
What The Heck Is Coco Coir Anyway?
Coco coir is a natural fiber derived from the outer husk of coconuts, serving as a versatile and sustainable growing medium for plants. It is composed of the fibrous material found between the hard internal shell and the outer coat of a coconut.
Originally a byproduct of coconut processing, it has become a valuable growing medium for gardeners and hydroponic enthusiasts. Coco coir comes in various forms, including coco pith, coir dust, and small chunks, each offering unique benefits for gardening applications.

What Makes Coco Coir Different Than Other Growing Mediums?
- Excellent Water Management: Coco coir can absorb up to 10 times its weight in water while maintaining good aeration.
- Structural Stability: It retains its structure well, preventing compaction and promoting healthy root growth.
- pH Neutrality: Coco coir has a natural pH range of 5.5-6.8, making it suitable for most plants without additional pH adjustments.
- Renewable Resource: As a byproduct of the coconut industry, coco coir is an eco-friendly alternative to peat moss.
- Natural Resistance: It possesses inherent anti-fungal properties, helping to minimize plant diseases.

Why Are More Gardeners Chooseing Coco Coir?
- Superior Water Retention: Holds up to 10 times its weight in water while maintaining good aeration, reducing watering frequency.
- Improves Soil Conditions For Root Growth: The balanced air-to-water ratio optimizes nutrient availability and soil structure for root development.
- Optimal Nutrient Absorption: Coco coir creates an ideal environment for nutrient uptake. This pH level enhances the availability of essential minerals, allowing plants to efficiently absorb and utilize nutrients from fertilizers and amendments.
- Sustainable and Eco-Friendly: As a renewable resource, it’s an environmentally conscious choice for gardeners.
- Disease Resistance: Naturally resistant to fungal growth and root rot, promoting healthier plants.
- Versatility: Can be used alone or mixed with other materials to improve soil structure and enhance moisture retention.
- Reusability: Can be reused for multiple growing cycles, making it cost-effective for gardeners.
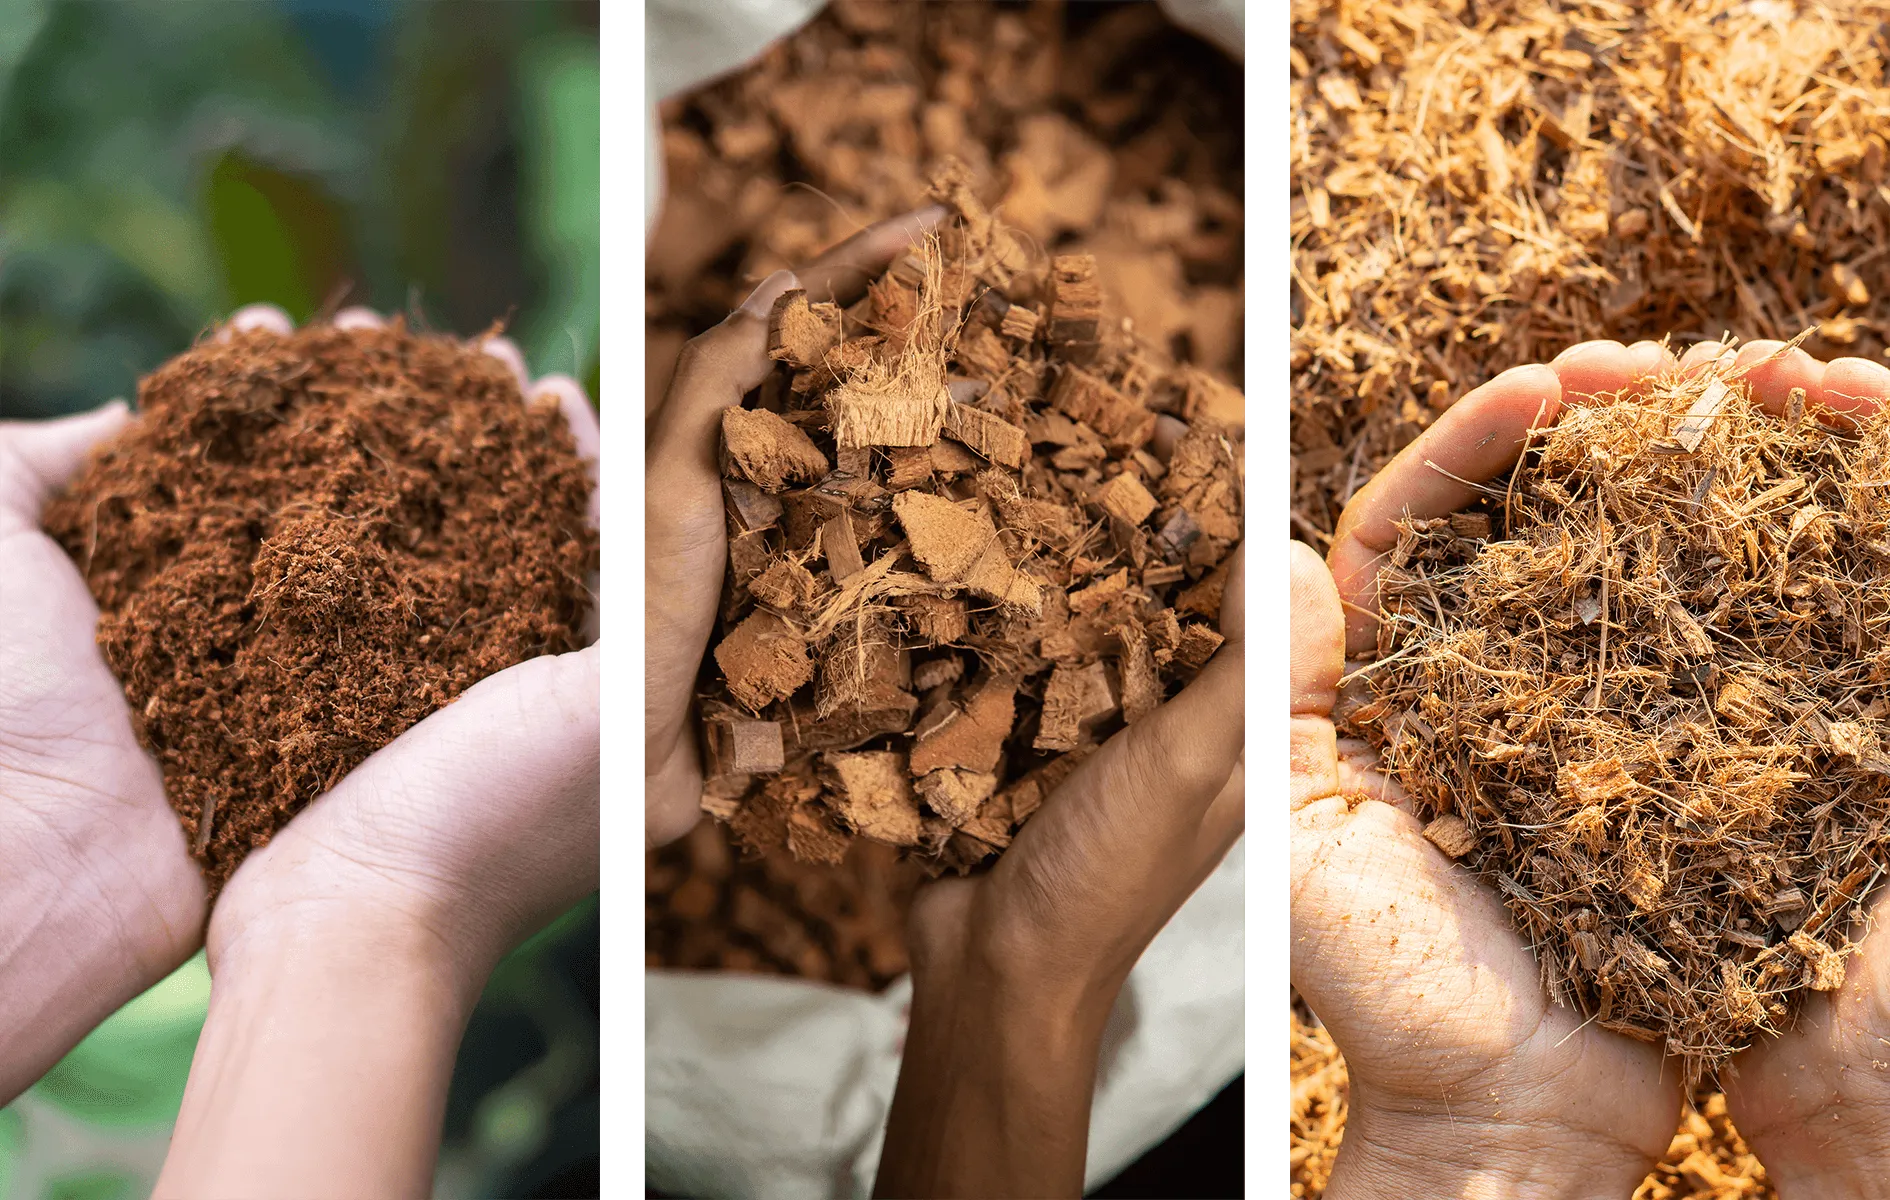
What Are The Different Types Of Coco Coir?
Coco Pith (Coco Peat)
- Fine, soil-like consistency: Coco pith has a texture similar to peat moss, with small particles that create a dense, spongy medium.
- Excellent water retention: It can hold up to 10 times its weight in water, making it ideal for plants that require consistent moisture levels.
- Perfect for seed starting and soil amendments: Its fine texture and water-holding capacity make it excellent for germinating seeds and improving soil structure.
- pH neutral: Coco pith has a neutral pH (5.5-6.8), making it suitable for most plants without additional pH adjustments.
Coco Fiber
- Long, stringy fibers: These are the longer strands extracted from coconut husks, providing structural support to the growing medium.
- Improves soil structure: When mixed with soil, coco fibers help prevent compaction and improve overall soil texture.
- Enhances drainage and aeration: The fibrous nature creates air pockets in the soil, promoting better root growth and preventing waterlogging.
- Durability: Coco fibers break down slowly, maintaining soil structure for extended periods.
Coco Chips
- Larger chunks of compressed coir: These are coarser pieces of coconut husk, typically ranging from 1/2 inch to 1 inch in size.
- Long-lasting soil amendment: Due to their size, coco chips decompose more slowly than other forms of coir, providing benefits over a longer period.
- Great for orchids and epiphytes: The chunky texture allows for excellent drainage and air circulation, ideal for plants that prefer quick-draining conditions.
- Versatile applications: Coco chips can be used for mulching, as a decorative ground cover, and in hydroponic systems for larger plants.
- Moisture management: They help maintain consistent moisture levels while preventing soil from becoming waterlogged.
Each type of coco coir offers unique benefits, and they can be used individually or in combination to create optimal growing conditions for various plants and gardening applications.

How to Prepare Coco Coir for Gardening: A Step-by-Step Guide
1. Start with High-Quality Coco Coir
- Choose reputable brands: Look for coco coir from established manufacturers to ensure quality and consistency.
- Check for contaminants: Ensure the coco coir is free from debris, insects, and pathogens.
- Consider pre-buffered options: Some brands offer pre-buffered coco coir, which has been treated to adjust its calcium and magnesium levels. This treatment helps prevent these essential elements from being bound to the coir, potentially making them more available for plant uptake.
2. Rehydrate Thoroughly with Water
- Use a large container: Choose a container that’s about 3-5 times the volume of your dry coco coir.
- Add warm water: Warm water helps the coir absorb moisture more quickly. Use about 5 parts water to 1 part coir.
- Allow time to expand: Let the coir soak for at least 15-30 minutes, or until fully expanded.
- Drain excess water: Once expanded, drain any standing water to prevent oversaturation.
- Manage expectations: As coco coir is a natural product, hydration may vary between batches. There’s no perfect formula for water requirements, as material quality can differ. Be prepared to adjust water amounts based on the specific coir you’re using and its absorption rate.
3. Add Calcium and Magnesium Supplements if Needed
- Test pH and EC levels: Use a pH meter and EC (Electrical Conductivity) meter to check the coir’s properties.
- Add Cal-Mag supplement: If using non-buffered coir, be aware that it may bind these elements. Some growers choose to add calcium and magnesium supplements to their nutrient regimen to ensure adequate availability for plant uptake.
- Follow manufacturer’s instructions: Use the recommended dosage for your specific brand of Cal-Mag supplement.
4. Mix with Other Components for Custom Blends
- Add perlite for drainage: Mix in 10-30% perlite to improve aeration and drainage.
- Incorporate vermiculite: Add vermiculite to increase water retention if needed.
- Consider adding compost: For outdoor gardening, mixing in some compost can provide additional nutrients.
- Enrich with worm castings: If you don’t have access to compost, add 15-20% worm castings to your soil mix. Worm castings improve soil structure, enhance nutrient availability, and introduce beneficial microorganisms.
5. Adjust pH if Necessary
- Target optimal pH range: Aim for a pH between 5.5-6.5 in coco coir, as this range allows most plants to efficiently absorb nutrients.
- Use pH adjustment solutions: Utilize pH Up (alkaline) or pH Down (acidic) products to carefully modify the pH. Start with small amounts and test after each addition.
- Consider natural alternatives: For organic growing, use lime to raise pH or sulfur to lower it.
- Allow pH fluctuation: It’s beneficial to let the pH drift within the acceptable range between waterings, as different nutrients are more available at varying pH levels.
- Adjust for growth stages: During seedling and ripening phases, target a slightly higher pH (6.1-6.3) within the acceptable range.
- Monitor regularly: Test pH frequently, especially after adding nutrients or adjusting water quality, as these factors can influence coco coir’s pH over time.
- Be mindful of water quality: The pH of your water source can significantly impact coco coir pH. Address any water quality issues before making other adjustments.
6. Let the Mix Rest
- Allow time to stabilize: Let your prepared coco coir mix rest for 24 hours before use.
- Recheck pH and EC: After resting, test the levels again and make final adjustments if needed.
Follow these steps, and you’ll create an optimal growing medium that leverages all the benefits of coco coir while addressing its potential limitations. This preparation process ensures your plants have the best possible foundation for a healthy environment to grow.
Why Choose Coco Coir?
Coco coir offers an excellent balance of water retention and aeration, making it ideal for both beginners and experienced gardeners. Its sustainable nature and versatility make it a superior choice for modern growing methods.
By understanding these unique properties and benefits, gardeners can make informed decisions about incorporating coco coir into their growing practices, whether for traditional gardening, container growing, or hydroponic systems.